NEW
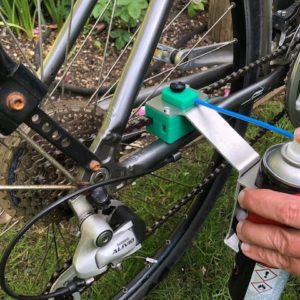
The idea for the ChainMate Chain Tension Gauge came about during lockdown, when I started thinking about what other products, I could design to make motorcycle chain maintenance easier. I have always had problems measuring the chain tension accurately as I get older and as my eyesight inevitably deteriorates, it’s becoming harder to do! I struggle with holding the rule steady while pushing the chain up and then down at the same time, in addition to reading the measurement and calculating the difference.
I realised that I couldn’t be the only person struggling with chain tension measurement and subsequently, I came up with the idea for a tool to simplify the process; to push and pull the chain whilst simultaneously marking the travel. After several sketches, I was left with a rough solution – it just needed to be manufactured and tested to iron out any issues. I wanted to make it simple and affordable, but still robust enough to last a lifetime. After attempting to have some prototypes made in aluminium and finding the process to be expensive and slow, I started to consider alternative manufacturing methods. My son and daughter have previously suggested purchasing a 3D printer to make some parts – I had seen them at engineering shows and marvelled at the complex components that can be made (you can even print stainless steel nowadays!). I set about changing the design of some of the parts so that they could be printed, before contacting a local additive manufacturing company to get a prototype 3D printed. This was expensive, but still a lot cheaper than using aluminium! Now I had a working prototype to try out on my bikes, allowing me to confirm that the concept works and check whether the parts require any alterations.
As it turned out, I did need to change some parts and it also highlighted the need to buy a 3D printer. I did some research and with the help of my daughter, purchased a 3D printer capable of making the parts required. I now had to learn how to do 3D printing, but fortunately my son – who is also an engineer – volunteered. We had a few a few teething problems in choosing the right material and the correct settings but, in the end, we now have accurate, quality parts.
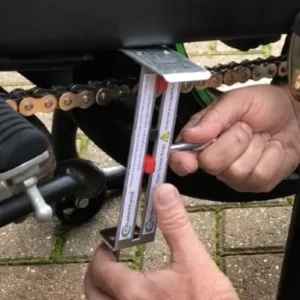
Using the Chain Tension Gauge (CTG) is remarkably simple. You first need to read your motorcycle handbook to find out whether the chain tension is measured with the weight on the back wheel or without. With my bike, the weight of the bike is on the back wheel, meaning that I need to place the bike on a paddock stand. You then need to spin the wheel and find the tightest area on the chain (chains always tend to have tight areas after a period of use). Once you have found the tight area of the chain, you can then use the CTG to measure the chain tension as follows:
- Place with the chain inside the fork.
- Push the upper plate against the underneath of the swinging arm. Then push the two markers so that they are in contact with the fork.
- Using the handle at the bottom, push the chain up until you see the upper run of the chain move. Now pull the handle down until you again see the chain on the upper run move.
- Once you have done this, you can remove the CTG. Using a rule, measure the distance between the lines on the two markers.
- Deduct 20mm (3/4 inch) from this measurement to give you your chain free-play or chain tension.
- Adjust your chain and re-check.
Cost is £15.00 + shipping (£3.95 UK)